Let’s start from the beginning

So I am apparently just very poor at this whole “keeping up with blogging” thing. I do try – I think about it often, I make a lot of plans – and then things fall through, or I get busy with something else, or my rampant perfectionism gets in the way and I convince myself I can’t do it the way I want, so why bother.

Yep.

In this case it was mostly a combination of the latter two. Two VERY BIG THINGS got in the way, and my rampant perfectionism was interfering with both miniatures and one of the big things.

The excellent news is that one of those big things? Done and over. I FINALLY finished my master’s thesis, and I officially have an MA!

Then I graduated 🙂

It was a long time coming, and two years overdue, but I finally made it. And on the way TO graduation, my husband and I got to tell my family about the other VERY BIG THING:

11872750_10102557077058929_1640927470_n

I present to you the newest miniature we are expecting in our lives, Little Jedi. (Keep in mind she looked nothing like that at the time, this is a slightly more recent image.)

So not only is this a VERY BIG THING that has really interrupted my life for the absolute amazingly better, it’s made mini-ing a bit difficult! First morning sickness, then exhaustion, and now a growing bump that makes it difficult to bend over and get close to things.

So with all this, I’m a bit behind on my Creatin’ Contest build. As in, I kind of just started it. And if I manage to finish it in time, it’s also extremely unlikely I’ll be able to get my photos in due to the fact that the Little Jedi up there? She’s due to come out around December 24, only 8 days after the contest closes. Ha!

But you had better believe I’m going to be busting my butt to get there 😀

So now with that crazy explanation over with, let me at least show you what I’ve been up to.

On Tuesday, which I have now declared to be #powertooltuesday (pretty sweet, huh?) I hauled out my scroll saw to the deck.

IMG_20150901_182858780

The deck railing is a pretty awesome place to clamp it to while I worked. The only limitation was that I was trying to do some straight cuts on some long boards to make some walls for the basement (we do have a circular saw, but remember the whole “Jedi isn’t a fan of loud noises”? Yeah) and the finials on the corners kept getting in the way. I made do.

My lovely husband finally cut a nice board for me to mount the dollhouse to, for which I am grateful, particularly as the basement needs to be mounted first, of course!

After cutting the walls, I took some scrap wood and also cut some supports. And that was the end of scroll saw for the day.

Here’s an idea of what I’d gathered at that point:

IMG_20150901_182922199

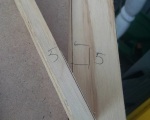
On top you see the 3 supports ready to hold the wall they’re lying on in place. Underneath that wall is the floor from the City Cottage, which I used to position the walls in order to place the supports and ensure it was all going to work! I traced around the bottom of each support, and numbered them since it was scrap wood and they were all sized slightly differently.

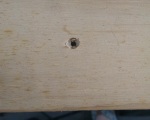
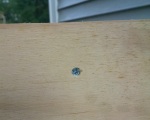
The numbering is especially important because of the next step: I grabbed some paint and put a small little dot of it right in the center (or close to) of the rectangle I’d traced around the support end. Then I took the support in question, and carefully placed it back into the traced square, so it absorbed the dot of paint. Why was this necessary? Because I planned to both glue and screw all of them in place for an extra-secure hold, and since I was dealing with scrap plywood, it was imperative that I drill some pilot holes. I clamped the supports to the deck wall, and drilled a pilot hole in each one, straight through the dot.

IMG_20150901_183416225 IMG_20150901_183021338 IMG_20150901_184204422_HDR

Next, I used the same paint points to drill holes in the base board – less important for splitting, but utterly crucial to knowing where on earth I needed to place the screws! 😉 Then I did a trick I figured out for myself back when I made the American Girl doll bunk beds – I took the largest drill bit I have, and made a very shallow hole over each of the pilot holes I’d drilled. This is a brilliant technique that mimics what I’d have done with a sinkhole drill bit, something I don’t have – I can sink the screws well into the project, and not worry about them scratching any surfaces.

IMG_20150901_184527101 IMG_20150901_184601216 IMG_20150901_185444650

I completed that with all 5 supports, then glued & screwed each one into place. I ended by gluing the walls to the supports and clamping in place until they were dry (okay…mostly dry, I’m impatient and it had to come back inside overnight).

I’ll be back with more about all of this next week!

I Finally Get It

I used to spend a lot of time wondering how some of my favorite mini artists could possibly look at a kit and come up with a great way to bash it, especially so it no longer really looked like the kit itself. All of my own ideas for alterations to a kit build came long after I received it, did a dry fit, and spent some time pondering what it would be.

Then it happened.

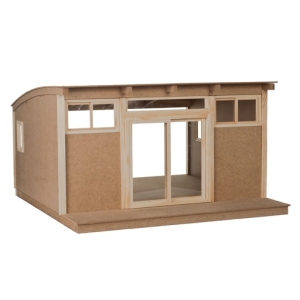
Hobby Builder’s Supply announced their 2015 Creatin’ Contest, and the kit’s potential smacked me in the face.

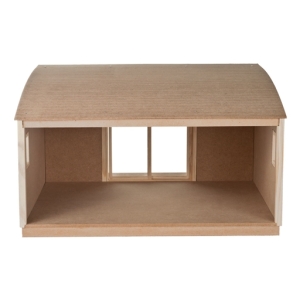
92015_lg

The front isn’t quite what gave me the inkling. I looked at it and really thought hard about another tiny house, much like the one I started for last year’s Undersized Urbanite contest (and am still working on…). But the dimensions are a little too big for a good tiny house – and a little too small for a “small home,” in my opinion. I’d have to come up with a lot of good ways to fill the empty space.

Then I saw the back of the build.

92015a

I don’t know what it is about the back here that really made it stand out to me, but it did. I had been browsing home plans recently in preparation for, of all things, a new house to build in Minecraft. I have a good deal of experience with both Minecraft and Sims architecture, so my requirements for house plans are pretty strict. Specifically for Minecraft, I need a small house but one with enough room for very thick walls, since that’s the nature of Minecraft blocks.

I finally found a house I really liked for Minecraft. It’s out of my usual comfort zone – I typically prefer more traditional style builds, and this one is very contemporary/modern.

w1024x683

The floor plan is going to need to change a bit; here you’re looking at it from the back. In the end, I’ll essentially have an open-front home with a really magnificent “back” of the house, haha. I’m still trying to decide if I will add a basement, and what I will do with that…but there’s some time to figure that out, still. In the meantime, I’m going to have a lot of fun actually walking through my 3-D version in Minecraft, and envisioning recreating it in miniature.

So, long story short, I’m throwing my hat into the ring for the Creatin’ Contest. Hopefully I won’t get bowled over here. I am planning to make this a public build, because I really enjoy sharing my ideas here, and because my photography skills need some practice. But I really can’t wait to see what happens when the kit arrives!

New Year, New Beginnings

Hello!

So, clearly I am still alive. As you may have guessed from my last update, things were…a little crazy. Between the unexpected loss of our beloved dog and moving out of state the very next day, I wasn’t in much shape to work on my minis – or much of anything else – all summer.

That isn’t to say the rest of my year was entirely mini-free.

In August, with the help of a friend far more familiar with power tools than I, I completed a set of American Girl-sized bunk beds for a sleepover with my nieces.

IMG_20150108_172814549

This was done using the awesome instructions from Ana White, which were super easy to follow. My only complaint is that the cuts she lists add up to a greater length than the boards on the shopping list. I purchased extra and still ended up with only a couple of feet of scraps. I will also add that I specifically added length to the bed, because the length she gives leaves a bed barely long enough for the doll. Yup, I’m picky like that.

A couple of weeks later, at the beginning of Fall, we added a new “miniature” to the family, our new puppy Vala:

The little cutie within just a couple of weeks of coming home :)

The little cutie within just a couple of weeks of coming home 🙂

As I’m sure you can imagine, a new puppy takes an awful lot of time and energy. She has been so, so worth it, though! After only a few weeks without our dog, our home felt so empty I couldn’t stand it. Rhys will always irreplaceable, but his “little sister” is amazing in her own right. Infuriating at times (Corgis generally are) but wonderful.

Vala, only a couple of weeks ago :)

Vala, only a couple of weeks ago 🙂

Which brings us to now. After a few trials & errors getting our basement set up, including a dishwasher replacement that ended with a near-flood straight into the middle of the finished half (no property damage, thankfully!) we finally organized the basement well enough to set up my craft area. With all that had happened this year, I didn’t want much for Christmas, but when my husband asked me to tell him what I REALLY wanted, all I could think of was my craft table.

Of course, a new home with more space needs an excellent craft table, so here it is…

A smooth 4'x8' plywood board is my new crafting surface!

A smooth 4’x8′ plywood board is my new crafting surface!

Nice and large and ready for plenty of minis. It will take some time to get everything set up again, but in the meantime I’m pretty excited.

A couple of other updates of note: My master’s thesis is progressing really well, finally, and I’ve successfully defended my proposal and have moved on to data analysis. I also joined a new Minecraft server mid-summer, and recently became an administrator of said server, which is an amazing privilege and a lot of fun.

Also over the summer, the official Real Good Toys Pinterest feed featured my last true miniatures update: Tufting a Mini Couch. Of course it would so happen that this occurred during my hiatus, because it drove a ton of traffic here. I know it was well liked by many, however, because not only did my traffic explode, but I began seeing my own tutorial pinned on nearly every Pinterest miniatures board I follow! That was a massive honor, and I hope to finish the couch soon so you can all see how it turns out 🙂

All of this said and done, I’m really looking forward to getting back to miniatures, and boy do I have a lot of plans. Tomorrow I’ll outline my next project, which is something I will definitely need to finish….

Until tomorrow!

Moving…

Everything is currently on hold while I move to a new home this weekend. Hopefully I’ll be back to miniatures soon.

In the meantime, if you are willing and able, I would appreciate positive thoughts and prayers for my beloved dog. He suffered an accident yesterday and will be having surgery today to fix some internal bleeding and remove a mass from his liver. So far he is doing quite well, but that doesn’t make it any easier for us.

I hope all of you, my wonderful readers here, are having a great start to your summers and finding plenty of time to mini away!

Best wishes, and hope to be back here soon!

Update: I’m heartbroken to say my beloved puppyboo is no longer with us. Thank you for your prayers. We did everything we could possibly do, it was just a combination of many unfortunate factors which came together at once. I am very grateful he did not suffer today, and I am happy he will not be needlessly stressed by our move tomorrow. We will miss him greatly.

Tufting a Mini Couch

It’s highly unlikely I’ll finish my Undersized Urbanite build at this point, sadly, but I am still plugging away and having a good time when I can. Right now I am still teaching, writing away at my thesis, and now we are moving in less than 2 months. Lots to do, and sadly minis don’t take mini amounts of time!

Most recently I’ve been working on the sofa. I wanted it to be both grand and understated, or at least that’s the best way to describe it. I had a House of Miniatures Chippendale Sofa kit on hand, and decided to utilize it to make my visions come true.

IMG_20140328_210820269

I’ve seen an awful lot of tutorials on Pinterest about making your own upholstered, tufted headboard, and I used many of the techniques here. I started by marking out lines on the back of the sofa, to create half-inch squares. I then drew diagonal lines to find the middle of each square, and proceeded to use a pin vise to drill through the back. This helped me to create an offset pattern for each of the “buttons.” If I had truly thought it through, I would have begun with a centered line – sadly, I did not, but ultimately I don’t think it would have done a whole lot to change the finished product.

IMG_20140328_211108175    IMG_20140328_211143359

The next step was to find the best way to cover the couch. House of Miniatures kits are old, and while the foam included for the couch cushions was in good shape, I knew it is likely to dry out and disintegrate in the near-ish future. I ended up cutting new cushions out of pink craft foam, 2 layers. Unfortunately for me, the pink of the foam showed through the linen-esque fabric I chose, even after a layer of white felt. I ended up covering the bottom half with a scrap of fabric (seen above – you can see some of the pink through it!) and the top half with another piece of felt to add a little extra fluff to the top part of the couch. When it’s all covered with the larger piece of fabric, you can see it looks pretty uniform in color.

The next part was by far the most difficult part of the whole process – adding the tufts. The holes were quite small, and finding a way to keep the threads pulled really tight was hard. I ended up using two different methods – nails and bead crimps. The bead crimps were easier, but if I had to do it again I’d do nails all the way. More complicated, but it seems like a stronger hold. You can see the nails below – they are the tops of jewelry pins, cut off and carefully hammered in partway.

IMG_20140329_114934852    IMG_20140329_115009389

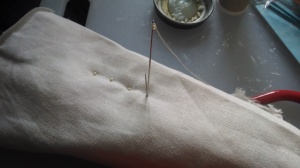
To get the thread through the holes, I first put a bead on the thread and put both ends of the thread through a long needle (Needle 1). I then took a second needle (Needle 2) and pushed it through the hole from the back of the couch. Next, I took Needle 1 and pushed it through right next to Needle 2. Then Needle 2 was pulled out from behind, and Needle 1 was pushed all the way through until all thread had come out the back. I then taped the thread down so it wouldn’t accidentally be pulled out. This took a little trial and error, as Needle 1 was not always in the correct position to just go straight through the pre-drilled hole, but it was by far the easiest way to get the needle through all layers of foam, batting, and fabric, in the right place!

IMG_20140329_121458255

Once I had the full row done, I pulled the threads as tightly as I dared, wrapped them around a nail several times, and held the thread tight while I hammered the nail in fully. This is definitely the way I would recommend doing this if you try, and if I try tufting another piece I will do it this way again. It is complicated and can be frustrating, especially if you knock a nail out, but is far easier than the bead crimps. Had I known I’d use bead crimps, I definitely would have picked up sturdier thread. Occasionally the crimp would just cut right through the thread and I would have to completely re-do the tuft all together. I’ve also had a couple come loose since I finished, leading me to have to glue a couple of beads back on – definitely not ideal!

IMG_20140329_122812492

This is the unfinished product – one row done! I did not bother tufting all the way down, because half of the back is hidden behind the back cushion. Instead, I started in the middle and worked my way up.

IMG_20140405_132505043

The finished product! Before I attach this to the rest of the couch, I’ll take a needle and try to get all of the beads facing the same way. Until then, I think it looks pretty darn good!

Life is a little crazy

IMG_20140314_145622195It has been far too long since I have been able to make a post about progress – sadly, not a whole lot of progress has been made. Since my semester ended in December, I’ve been working on my thesis a lot, but I have also been hired as a teaching fellow for a huge university, which is a very awesome step for me! Unfortunately, it means less time for minis – but I’m trying!

Above is the progress I’ve made on the kitchen. You can see a bit of the staircase as well – that will have a nice feature of some pull-out stairs 🙂 After struggling with options for the counter top for a while and really not being happy with any of my DIY options, I finally decided to contact ELF Miniatures about a custom worktop. Elizabeth at ELF has been incredibly amazing, and I’ve experienced some of the best customer service I’ve ever been given. I can’t wait to showcase the final result!

The most work left at this point is finishing the kitchen, putting together the bathroom, and a few pieces of furniture. After that it will be decorating. I don’t know if I will be able to finish in time for the Undersized Urbanite, but I’ll certainly be trying!


Everything and the kitchen sink

Working on the kitchen has resulted in a lot of trial and error. I had a very specific vision for what I wanted it to look like, but figuring out what materials would actually get me there was not easy.

After a lot of wandering and musing, I finally found the perfect kitchen sink. I am not even kidding when I tell you this is version #3 of the sink – version 1 was made out of wood, but I was unable to get the shape I was looking for with the materials I had. Version 2 was attempted out of poly clay in several different forms before i realized it wasn’t giving me what I wanted, and baking it was going to be a nightmare!

So, on to version 3 – a chopped up full-size ice cube tray!

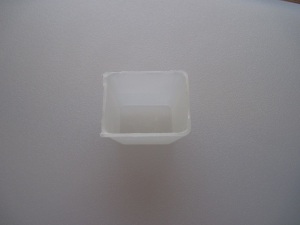
IMG_1442I know, it’s hard to really see. I was working with poor lighting and a white ice cube compartment on a white cutting board – my bad. It wasn’t until I was done when I realized I should have had a different background, paper or something, to better display what I was doing.

Ah well. I carefully cut out this one cube compartment from an old ice cube tray we had lying around. I’m pretty sure it was actually left behind by the previous tenant in our rental home – talk about repurposed freecycling! After I cut it, I sanded down the edges to make sure they were even and slightly rounded. This is going to be mounted under the countertop, so it needs to be able to be flush.

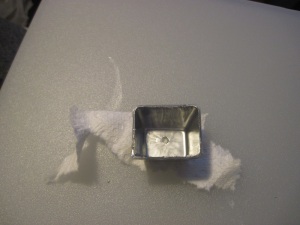
From there, I used a pin vise to drill a pilot hole, then a jewelry sander to make it big enough to insert a brad for a drain:

IMG_1443IMG_1446Once that was finished, 3 coats of silver enamel paint, and it’s nearly ready!

IMG_1448The paint job is sadly not the cleanest, but I’m considering a 4th coat tomorrow. Additionally, with the placement of the sink, I don’t think it will be too terribly noticeable – we shall see!


Playing with Poly Clay

My Pinterest feed is filled to the brim with gorgeous miniatures day in and day out, many of them pictures of miniature food, flowers, and other items made from polymer clay. While I love to spend ages pouring over the pictures and the websites they’re from, the artisans who make them (rightfully) charge higher prices than I am able to pay for the items I so covet.

Lucky for me, an awful lot of artisans, some in miniatures and some in other areas (e.g. beading and jewelry) are also willing to share their tips and techniques to allow people like me to get started without too much failure in the trial and error process. And so, here begins my journey in polymer clay!

I’m in the process of working on the kitchen for the Undersized Urbanite build (man, I really need to actually come up with a good name for it – any suggestions?) and due to the tiny size, I thought I would utilize some of the basic kitchen utensils as decor. I have actually already done this in my lifesize home, because my cookware doesn’t all fit in my cabinets, and I didn’t want to stack them because it would void their warranty.

314768_10100564392135489_44882342_nThere’s blue poster board behind them since we rent and I did not want to damage the walls – that also makes the whole ensemble look like a rather nice modern art installation, even when dirty pots are missing!

As I was musing for items I could feasibly utilize for decor in the tiny house, Christina at the Little Victorian posted this update to her home kitchen, inspired by photos from Houzz. Both my mother and grandmother occasionally hung cutting boards up in the kitchen, and it all just clicked into place.

That said, finding nice miniature cutting boards is far easier said than done. If I actually made them out of wood, the ultimate product would not look nearly so nice with the materials I have in store.

Enter polymer clay, a quick Google search of tips to create wood grain in clay, and a scant 20 minutes or so playing, cutting, and cooking:

IMG_1440They are modeled after my favorite olive wood cutting boards which my aunt introduced me to. I’m a little undecided if I am going to actually use these, or if I’ll have another shot at it. I cut the white clay with some brown, but did not think it would stand out quite so much – so we’ll see what the final decision is! If I decide to stick with them, in all likelihood I’ll only use one.

More kitchen updates coming soon 🙂


Happy Thanksgiving!

28315_700128824119_6380568_n

I’m with my family celebrating Thanksgiving today (and writing this post in advance – don’t worry, I really am spending time with them!) and wanted to recount some of the things I’m thankful for right now that are specifically miniatures-related.

  • My husband, who recognizes my need for creativity as a release from my life stresses, and supports me in my crazy tiny hobby emotionally and financially
  • The incredible miniaturists, both professional and amateur, who are so kind as to share their projects, tips, and tricks online to help all of us reach that teeny little peak of realism
  • Pinterest, for serving as a wonderful medium for sharing all of our mini finds
  • All of the kind independent sellers out there, on Etsy and eBay and their own websites, who are not only sweet enough to share their projects with the world but who are also very nice to work with (and who take the time to write out personal thank-you cards to their customers – holy cow, what dedication!)
  • Finally, my friends and family who are nice enough to listen to my excitement over my teeny tiny furniture and accessories without rolling their eyes or making fun of me

I hope you have a wonderful holiday – and if you are not a celebrant of the US Thanksgiving weekend, I do so hope you have a wonderful weekend!

Fun Find at Target

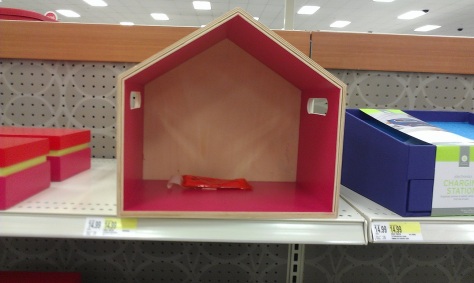
I haven’t had much time to work on my own minis lately, let alone document progress, but I wanted to share a fun find from running errands the other day.

IMAG0824This immediately jumped out at me as a “quick and easy” roombox base, or even a small dollhouse (1/2″ scale would work pretty well – or even as a toy dollhouse for some Calico Critters!).  If you’re interested in starting in miniatures but don’t know where to start, or if you’re just looking for your next minis project – this would make a pretty great start!  The shelf itself even comes with hardware for wall-mounting.  I was SO tempted to pick one up, but I really couldn’t justify the purchase that day with all the projects I’m already working on.